用 GitHub Pages 免费搭建自己的摄影网站Build a Free Photography Website with GitHub Pages
注册一个 GitHub 账号,准备好喜欢的照片,让 AI 帮你搭建一个免费的摄影网站。附上可以直接复制的提示词,以及这套方案的限制。Start with a GitHub account and a few favorite photos, then let an AI coding assistant help you build your own website. Includes a prompt you can copy and the limits of this free setup.
示例网站:目光所及 · 我的摄影集。可以先打开看看效果,再跟着下面的步骤搭建。
最近拍了不少照片,有街头、旅行,也有一些胶片。我想把它们整理成一个摄影集,按自己的喜好选封面、排顺序,再写一点拍摄时的事情。
于是有了目光所及。
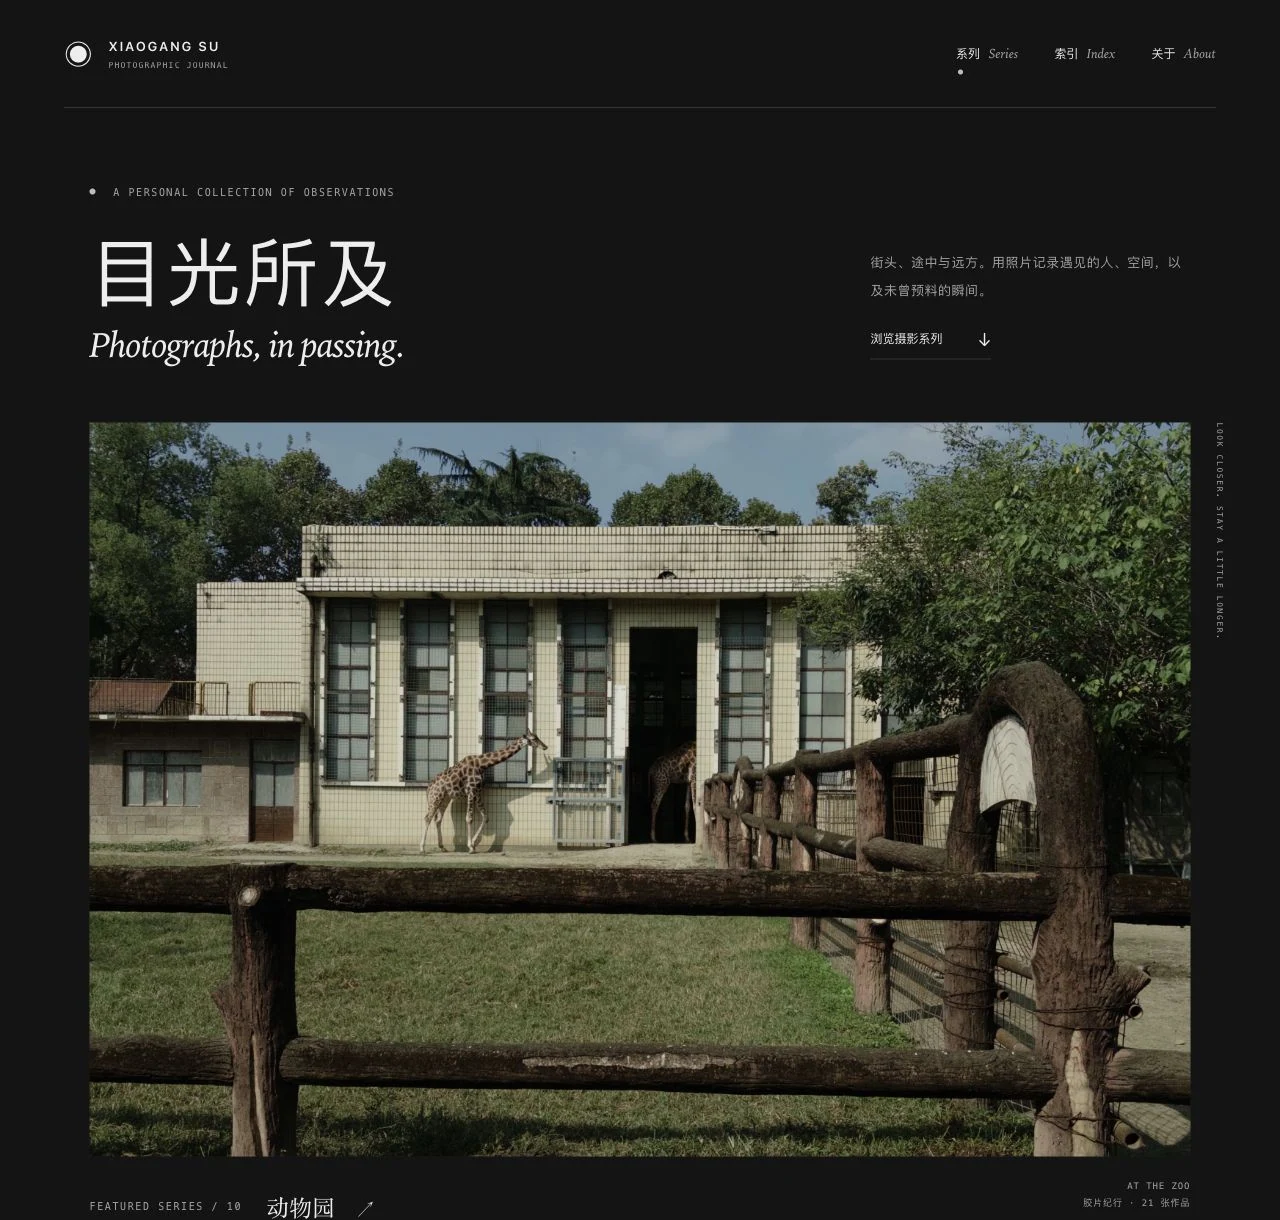
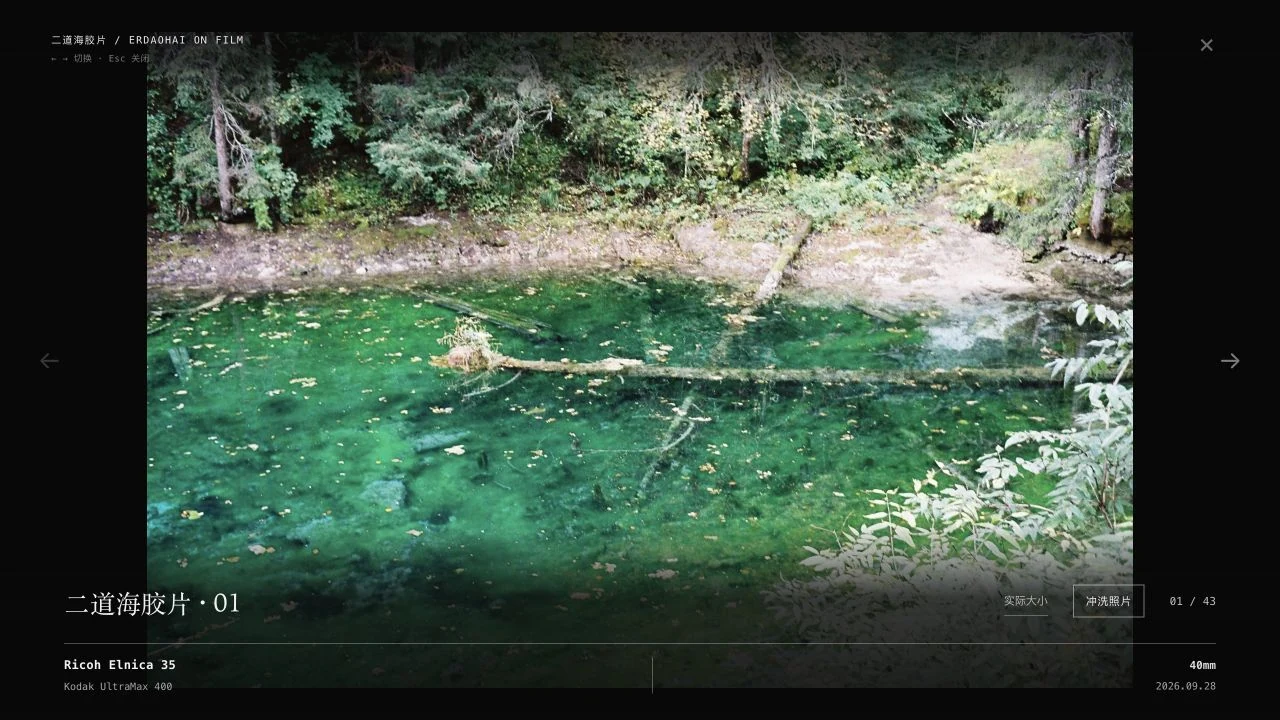
网站可以按系列浏览,也能点开一张照片慢慢看。胶片有自己的边框,照片下面记录着相机、胶卷和日期。我还加了一个“照片冲洗”:给喜欢的照片留一圈纸边,就可以保存下来。
这个网站没有租服务器,也没有购买图片存储服务。网页和处理后的照片都放在 GitHub 上,使用它提供的 GitHub Pages 发布。
如果你也想有一个这样的摄影网站,可以参考我的项目,让 AI 帮你搭起来。不会写代码也可以试试,遇到需要自己操作的地方,让它一步一步教你。
先简单说说原理
对原理不感兴趣,可以跳过这一段,直接从下面的“第一步”开始。
一个摄影网站,可以简单理解成一组网页和照片。别人打开网址时,浏览器把这些文件加载出来,就能显示文字、排版和图片。
在这套方案里,GitHub 的“仓库”负责保存文件,GitHub Actions 负责把它们整理成可以发布的网站,GitHub Pages 负责让别人通过网址访问。 AI 帮你修改网站、处理照片,再把更新上传到自己的仓库,后面的构建和发布就会自动进行。
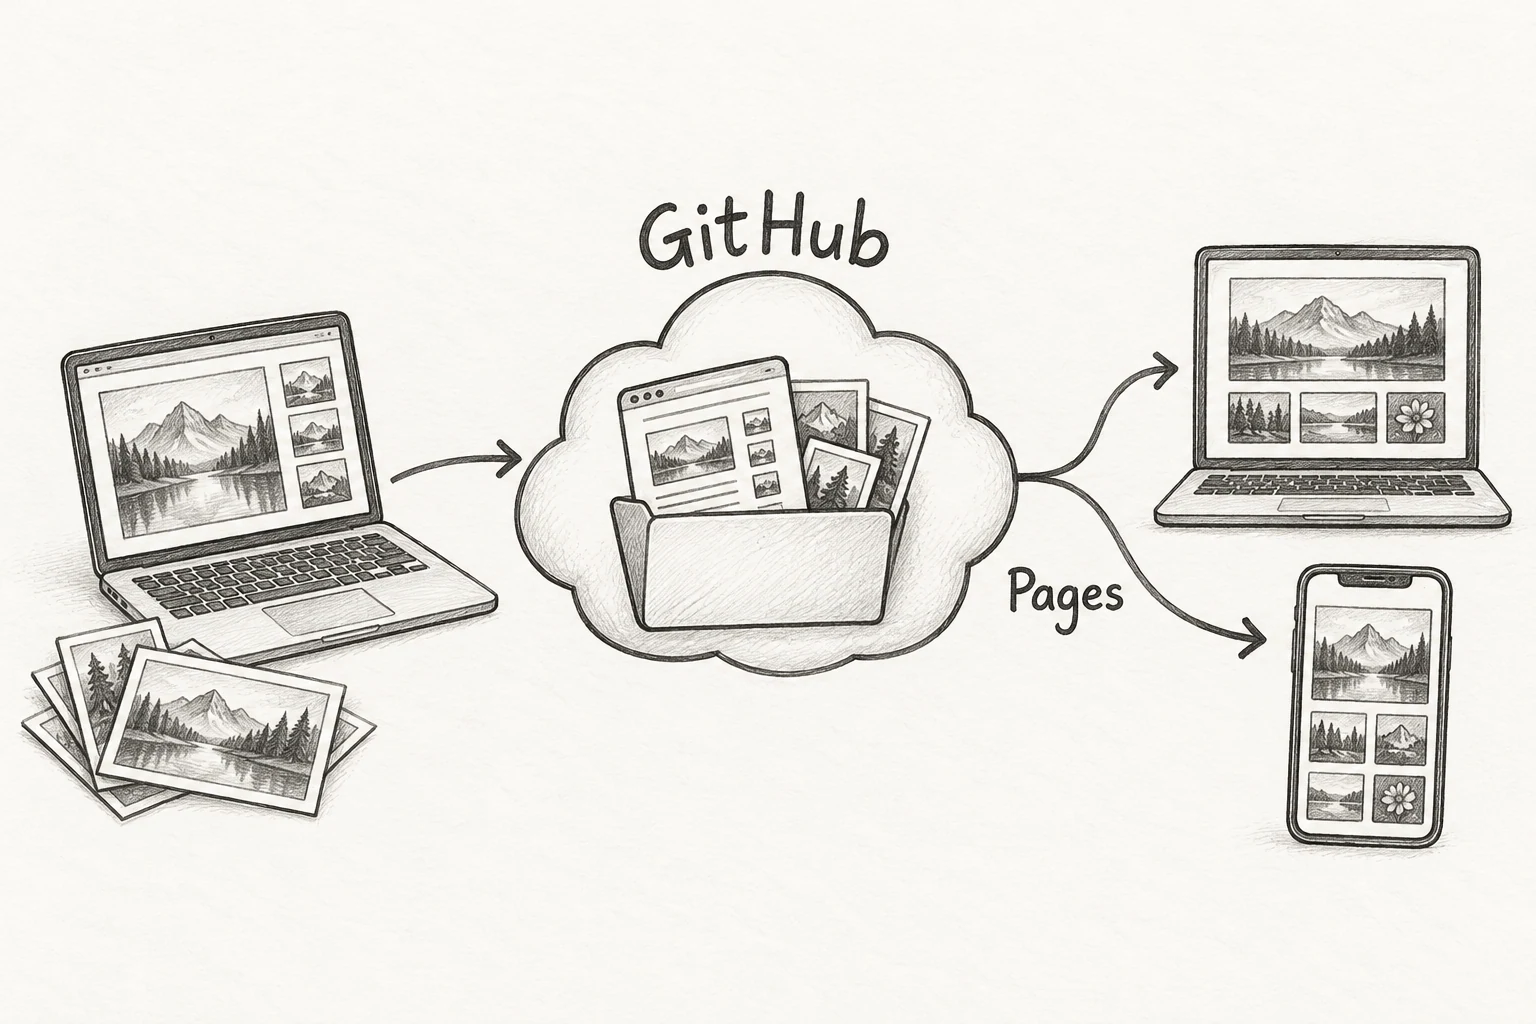
网站上线后,文件由 GitHub 提供给访客,所以关掉自己的电脑,别人依然可以打开。我们不需要自己租服务器,也不用让 AI 一直运行;只有想添加照片或修改网站时,才需要再打开项目。
第一步,注册一个 GitHub 账号
这是最先要做的事。你的网站和照片会放在自己的 GitHub 账号下。
打开 GitHub 注册页面,按页面提示填写邮箱、设置密码,完成邮箱验证。用户名可以认真想一下,因为它通常会出现在网站地址里。
比如你的用户名是 xiaoming,摄影网站就可以使用这样的地址:
https://xiaoming.github.io/photography/
注册账号免费,本文使用的这个网址也不需要另外购买。
你不需要先学会这些术语。记住:账号用自己的,网站也放在自己的账号里。
第二步,准备一小组照片
先选十几张自己喜欢的照片,放进电脑上的一个文件夹。不用一开始就搬完整个相册。
如果照片在苹果相册里,先导出到电脑,选择 JPEG 格式比较方便。可以按主题分文件夹,比如“海边散步”“回家的几天”,一个文件夹就是一个系列。
再准备几句简单的介绍:网站叫什么、你希望别人怎么称呼你、平时喜欢拍什么。也可以选一张个人照,放在“关于我”页面。
原照片继续留在自己的相册或硬盘里。网站使用的是缩小、压缩后的展示图片,这样别人打开时加载得更快,也能节省存储空间。
第三步,让 AI 帮你搭建
你需要一个能读取项目、修改文件和运行程序的 AI 编程助手。普通的聊天窗口可以帮你解释,但如果它不能操作电脑上的文件,就需要你自己复制代码和执行命令。对新手来说,前一种更省事。
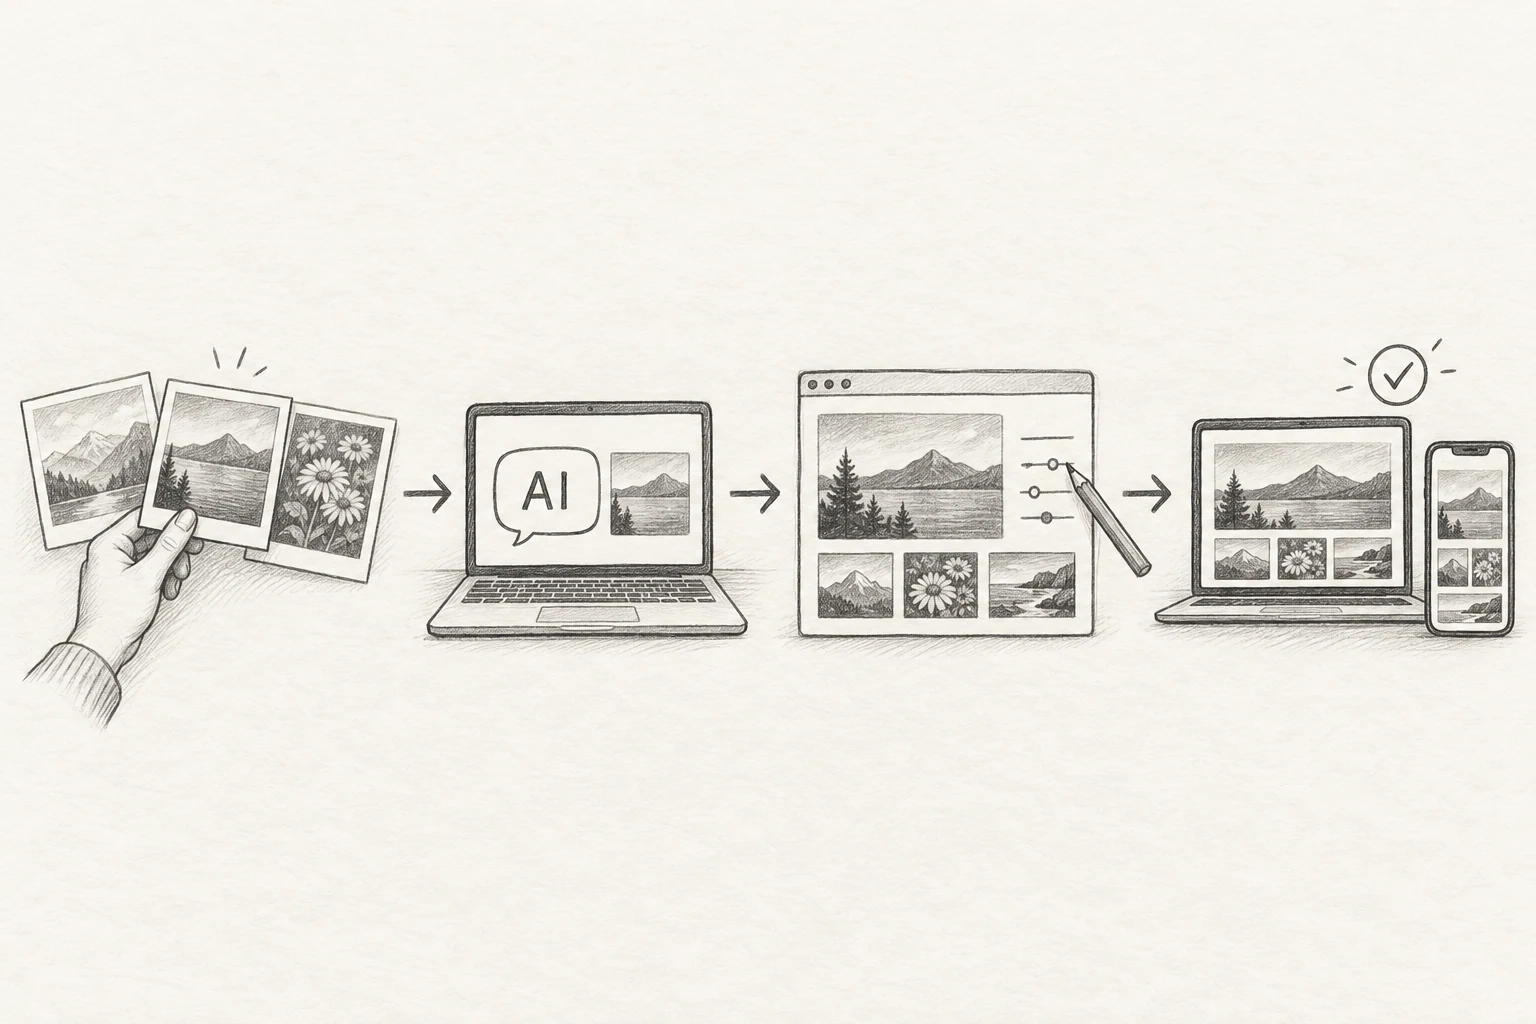
把文章最后的提示词发给它,再告诉它照片放在哪个文件夹。它会参考这个项目:
你可以先保留现有的样式,换成自己的名字、照片和介绍。等网站跑起来了,再慢慢调整颜色、字体和布局。
如果需要安装软件、登录账号,或者在 GitHub 页面上点某个按钮,就让它一次只讲当前这一步,做完再继续。遇到报错,把报错内容发给它,不用自己猜哪里出了问题。
密码、邮箱验证码和登录授权由你自己填写,不需要发给 AI。
第四步,先看效果,再上线
先让 AI 在你的电脑上打开网站。这个阶段只有本地预览,别人还不能通过公网地址访问。
你可以直接用平时说话的方式提要求:
海边那组用第三张做封面,竖着拍的照片保持竖着,首页先显示最近拍的系列。
看看照片有没有缺失、顺序是否合适、名字和介绍是不是自己的。也试试点开照片,以及“冲洗照片”的效果。
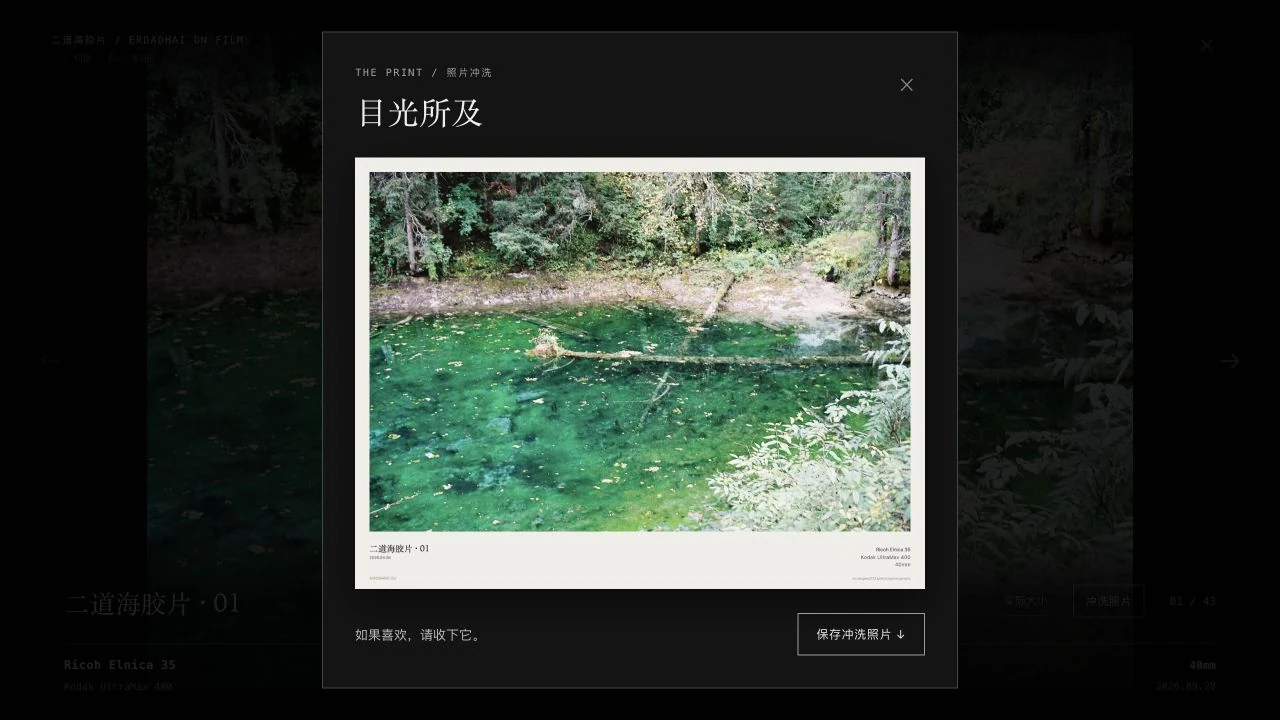
满意后,让 AI 帮你在自己的 GitHub 账号下创建一个公开的 photography 仓库,把网站上传,再开启 GitHub Pages。需要你登录或确认的地方,跟着提示操作即可。
如果要自己开启,可以进入仓库的 Settings → Pages,把发布来源 Source 选为 GitHub Actions。找不到也没关系,让 AI 带你找到这一页。
等发布完成,就可以把网址发给朋友了。最好再用手机打开一次,确认离开自己的电脑后,照片也能正常显示。
以后更新也一样:导出照片,告诉 AI 要放进哪个系列、哪张做封面,先看效果,再发布。
免费,但有一些限制
这里的免费建立在几个条件上:使用公开仓库、GitHub 自带的网址,以及项目采用的标准自动发布方式。以后购买自己的域名,或者增加其他付费服务,就会有额外费用。GitHub Pages 说明、自动发布的费用说明
照片会公开。 这套方案适合拿出来展示的作品。仓库里的展示图片可以被别人看到和保存,删除之后,旧记录或别人下载的副本也可能还在。不要把它当成私密相册。
空间有限。 GitHub Pages 发布的网站上限是 1 GB。一张原照片如果有 10 MB,100 张就接近这个大小了。容量限制
为了在有限的空间里多放一些照片,我没有上传原文件,而是把照片缩小、压缩成 WebP 格式后再上传。 比如一张 10 MB 的原照片,处理后的全部展示版本合计如果只有 1 MB,同样的空间就能放约十倍的照片,也就是增加一个量级。这只是一个计算例子,实际提升取决于原文件大小、图片尺寸和压缩程度;统计时还要把缩略图、大图等不同版本加在一起,让 AI 在发布前检查即可。
这些展示图用于网页观看,不能替代原片备份。原文件仍保留在自己的相册或硬盘里,GitHub 不适合用来保存整个照片库。GitHub 存储建议
访问速度和流量也有限。 GitHub Pages 每月带宽有 100 GB 的软限制,不同地区、不同网络打开图片的速度也可能不同。如果照片越来越多,或者访问量明显增加,可以再把图片搬到专门的图片存储服务。流量限制
它需要一点维护。 目前更新照片要借助电脑和 AI,并没有像手机相册那样的自动同步。它适合个人作品展示;如果要经营收费的多用户建站服务,就需要另外规划,GitHub Pages 对商业 SaaS 托管也有明确限制。使用政策
对我来说,先有一个能把喜欢的照片认真放好的地方,已经足够了。网站可以边用边改,照片也可以慢慢增加。
复制这段提示词,开始做自己的网站
先注册好 GitHub 账号,再把下面这段话发给 AI 编程助手。方括号里的内容换成自己的;拿不准的地方留空,让它问你。
我完全不会写代码,请帮我搭建并发布一个自己的摄影网站,一步一步带我完成。

请先阅读这个项目的说明和代码,再参考它来制作:
https://github.com/suxiaogang223/photography

我的信息:
- GitHub 用户名:[填写用户名]
- 网站名称:[填写名称,没想好可以先帮我起几个]
- 摄影师名字和简介:[填写,或者先问我]
- 照片所在文件夹:[填写路径,不知道怎么找就教我]
- 系列名称和封面偏好:[填写,或者看过照片后给我建议]

我希望网页和处理后的展示图片都放在我自己的 GitHub 公开仓库里,使用 GitHub Pages 和免费的 github.io 地址发布,暂时不购买域名、服务器或对象存储。

请在独立的新文件夹里制作,换掉原作者的照片、名字、介绍和链接,保留系列浏览、照片灯箱和“照片冲洗”。不要修改我的原照片,也不要改动我已有的其他网站。照片保持完整构图,竖幅不要裁成横幅。

请从照片中读取已有的拍摄信息;胶片的相机、胶卷和日期可以问我。缺失信息不要猜。原项目中的个人内容检查,也请调整为适合我的网站。

先检查我还需要安装什么软件,再开始操作。需要我登录、授权或点击网页时,请告诉我去哪里、点什么,一次只给我当前需要做的步骤。密码和验证码由我自己填写。

先给我看本地效果,等我确认后再上传和发布。发布前检查图片大小、公开内容和网站地址;发布后实际打开首页、系列和照片,确认能正常访问,最后把网址给我,并教我下次怎么添加照片。

如果你不能直接操作电脑或访问仓库,请明确告诉我,并教我怎样提供需要的文件或完成操作。不要只给我一堆代码,也不要把没有完成的部署说成已经上线。
Live example: my photography website, 目光所及. Have a look around before building your own.
I've been taking more photos lately: street scenes, trips, and a few rolls of film. I wanted somewhere to put them together, choose a cover, arrange the sequence, and write a little about each outing.
That's how my photography site, 目光所及, came about.
You can browse by series or open a photo for a closer look. Film photos have their own borders, with the camera, film stock, and date recorded alongside them. I also added a “Photo Print” feature: it puts a paper border around a photo you like and lets you save it as a JPEG.
I haven't rented a server or paid for image storage. The website and its resized photos live on GitHub, and GitHub Pages makes them available on the web.
If you'd like a site like this, you can ask an AI coding assistant to work from my project. You don't have to write the code yourself. Whenever you need to do something on your computer, ask it to walk you through that step.
A quick look at how it works
Not interested in the technical side? Feel free to skip this section and start with Step 1 below.
A photography website is a collection of webpages and images. When someone opens its address, their browser loads those files and displays the text, layout, and photos.
In this setup, a GitHub repository stores the files, GitHub Actions prepares them for publishing, and GitHub Pages makes the website available to visitors. The AI assistant helps you edit the site, process your photos, and upload the changes to your own repository. The build and publishing steps then run automatically.
Once the site is live, GitHub serves the files to visitors. Your computer can be switched off and the site will still work. You don't need to rent a server or keep the assistant running. You only need to return to the project when you want to add photos or make changes.
Step 1: Create a GitHub account
Do this first. Your website and photos will live under your own GitHub account.
Open the GitHub sign-up page, follow the instructions, and verify your email address. Give your username a little thought: it will usually be part of your website address.
For example, if your username is xiaoming, your photography site could be:
https://xiaoming.github.io/photography/
Creating the account is free, and you don't need to buy this website address.
You can learn the terminology as you go. The important part is that you use your own account and keep the website there.
Step 2: Choose a small set of photos
Pick a dozen or so favorites and put them in a folder on your computer. You can add the rest later.
If your photos are in Apple Photos, export them to your computer first. JPEG is a convenient choice. Group them into folders by subject, such as “A Walk by the Sea” or “A Few Days Back Home.” Each folder can become a series.
Have a few words ready about yourself, too: the site's name, the name you'd like to use, and what you enjoy photographing. You can also choose a portrait for the About page.
Keep the originals in your photo library or on your drive. The website uses resized, compressed copies so the pages load faster and take up less space.
Step 3: Ask AI to help you build it
Use an AI coding assistant that can read project files, edit them, and run programs on your computer. A regular chat window can explain what to do, but if it can't work with your files, you'll need to copy the code and run the commands yourself. An assistant with those tools makes the process easier for a beginner.
Give it the prompt at the end of this article and tell it where your photos are. The reference project is:
You can keep the existing design at first and replace the name, photos, and introduction. Once it's working, take your time with the colors, typefaces, and layout.
If you need to install something, sign in, or click a button on GitHub, ask the assistant for just the next step. If something goes wrong, send it the error message. You don't have to work out the cause on your own.
Enter passwords and email verification codes yourself. You don't need to send them to the assistant.
Step 4: Preview it, then publish
First, ask the assistant to open a preview on your computer. At this point, other people won't be able to visit it through a public address.
Describe changes the way you'd normally say them:
Use the third photo as the cover for the seaside series. Keep the portrait photos upright, and show the most recently photographed series first.
Check that all the photos are there, the order feels right, and the name and introduction are yours. Try opening a photo and using “Photo Print,” too.
When you're happy with it, ask the assistant to create a public repository called photography under your GitHub account, upload the website, and enable GitHub Pages. Follow its instructions whenever you need to sign in or approve something.
To enable Pages yourself, open the repository's Settings → Pages and choose GitHub Actions under Source. If you can't find it, ask the assistant to help you get there.
Once publishing is finished, you can send the address to a friend. Open it on your phone as well, to make sure the photos work away from your own computer.
Future updates follow the same pattern: export some photos, tell the assistant which series they belong to and which one should be the cover, preview the result, then publish.
What the free setup can and can't do
This setup uses a public repository, GitHub's included website address, and the project's standard automated publishing process. Buying your own domain name or adding paid services would introduce extra costs. GitHub Pages availability, automated publishing costs.
Your photos will be public. Use this for work you want to share. People can view and save the display images in the repository. Even after you remove a photo, it may remain in older records or in copies other people have downloaded. Keep private photos elsewhere.
Storage is limited. A published GitHub Pages site can be no larger than 1 GB. At 10 MB per original photo, around 100 photos would already approach that size. Pages size limit.
To fit more photos into that space, I upload resized, compressed WebP copies rather than the original files. For example, if a 10 MB original becomes 1 MB across all its display versions, the same space can hold about ten times as many photos—an order of magnitude more. That's an illustration, not a fixed compression ratio. The actual gain depends on the original file size, image dimensions, and compression settings. Count all versions, including thumbnails and large images, and ask the assistant to check the total before publishing.
These copies are for viewing on the web and don't replace a backup of the originals. Keep those in your photo library or on your drive. GitHub isn't a place to back up your entire photo library. Repository storage guidance.
Traffic and loading speed have limits, too. GitHub Pages has a soft bandwidth limit of 100 GB per month. Loading speed can also vary by region and network. As your collection or audience grows, you can move the images to a dedicated storage service. Bandwidth limits.
There is some upkeep. Adding photos currently involves your computer and the assistant; it doesn't automatically sync with your phone's photo library. This is a setup for a personal portfolio. A paid service hosting websites for many users would need a different plan, and GitHub Pages has specific restrictions on commercial SaaS hosting. Usage policy.
For me, having somewhere to put the photos I care about is enough to start with. The site can change over time, and the collection can grow a little at a time.
Copy this prompt to get started
Create your GitHub account first, then send the following to your AI coding assistant. Replace the text in brackets with your details. If you're unsure about something, leave it blank and let the assistant ask.
I don't know how to code. Please help me build and publish my own photography website, guiding me one step at a time.

Start by reading the documentation and code in this reference project:
https://github.com/suxiaogang223/photography

My details:
- GitHub username: [your username]
- Website name: [your choice, or suggest a few]
- Photographer name and introduction: [fill in, or ask me]
- Photo folder: [the path; if I don't know how to find it, show me]
- Series names and preferred covers: [fill in, or suggest after viewing the photos]

Keep the website and its processed display images in my own public GitHub repository. Publish through GitHub Pages using a free github.io address. I don't want to purchase a domain, server, or object storage at this stage.

Work in a new, separate folder. Replace the original author's photos, name, introduction, and links with mine. Keep series browsing, the photo lightbox, and Photo Print. Don't change my original photos or any existing websites. Preserve the full image, including the orientation of portrait photos.

Read available shooting details from the photos. Ask me about cameras, film stocks, and dates for film photos. Don't guess missing information. Adapt checks that depend on the original author's personal content to work with my website.

Check what software I need before starting. When I need to sign in, authorize something, or click on a webpage, explain where to go and what to click. Give me only the steps I need at that point. I'll enter passwords and verification codes myself.

Show me a local preview first and wait for my approval before uploading and publishing. Before publishing, check image sizes, what will be public, and the website address. Afterwards, actually open the homepage, a series, and a photo to verify that they work. Give me the final address and show me how to add photos next time.

If you can't access the repository or work with files on my computer, explain that and tell me how to provide the files or complete the steps. Don't just give me a pile of code, and don't say the site is live unless publishing has actually succeeded.